Activity execution
Great job! We have learned enough about flying! Now let's experiment with flying!
Here's what you need.
.jpg)
| Material | Quantity | Dimension/ size/weight (if applicable) | Alternative (if applicable) |
| Board marker | 1 | Standard | Pencil |
| Paper cutter | 1 | Standard | - |
| Tissue roll | 1 | 8” - 10” in length | - |
| Scissor | 1 | Round-edged | - |
| Pencil | 1 | Any | - |
| Plastic Bottle | 1 | 1.5 L | 1 |
| Glue gun | 1 | Any | - |
| Straws | 3 | Any | - |
| Cardboard piece | 1 | 10” x 7” | - |
| Duct Tape | 1 | ½” dia | Paper tape |
| A4 paper | 1 | Any | - |
| Balloons | 2 | Any | - |
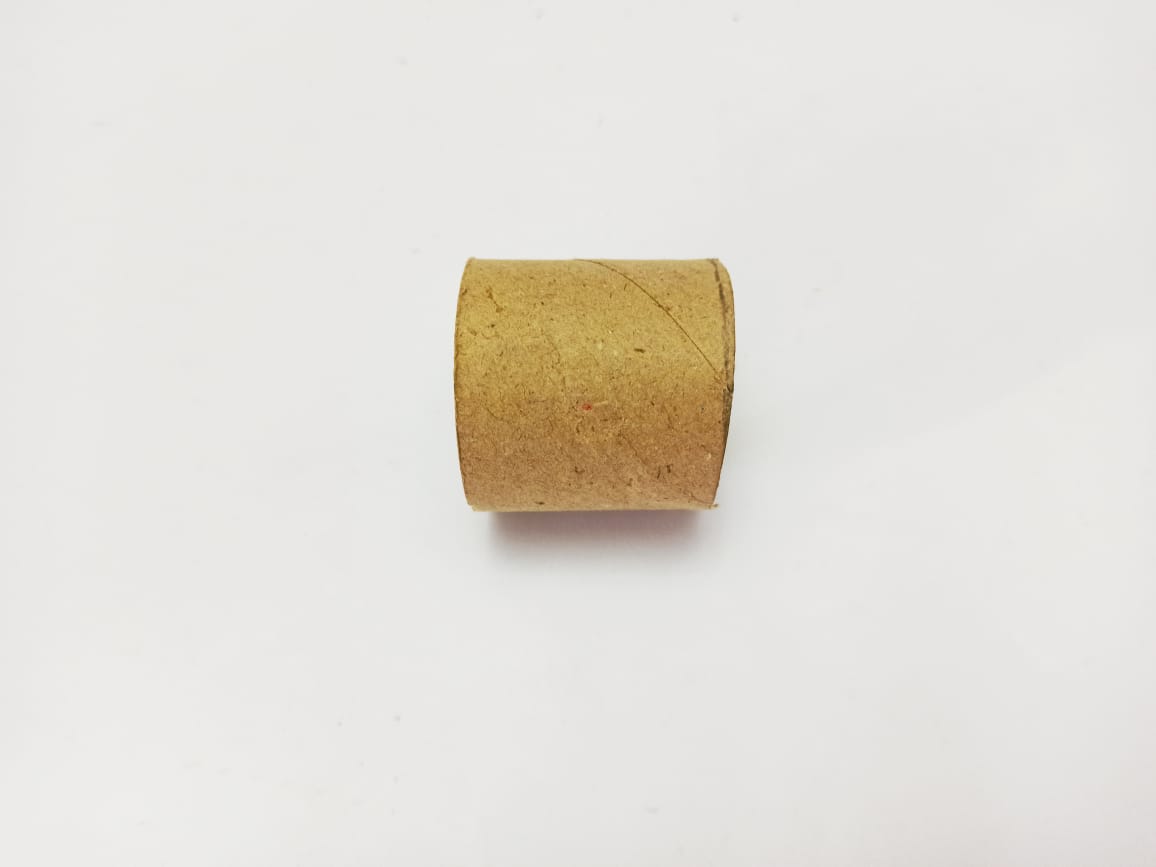
STEP 1: Take a tissue roll and cut it into half.

STEP 2: On the cardboard, sheet draws two circles of the size of the tissue roll.
STEP 3: Let's cut the two circles out!


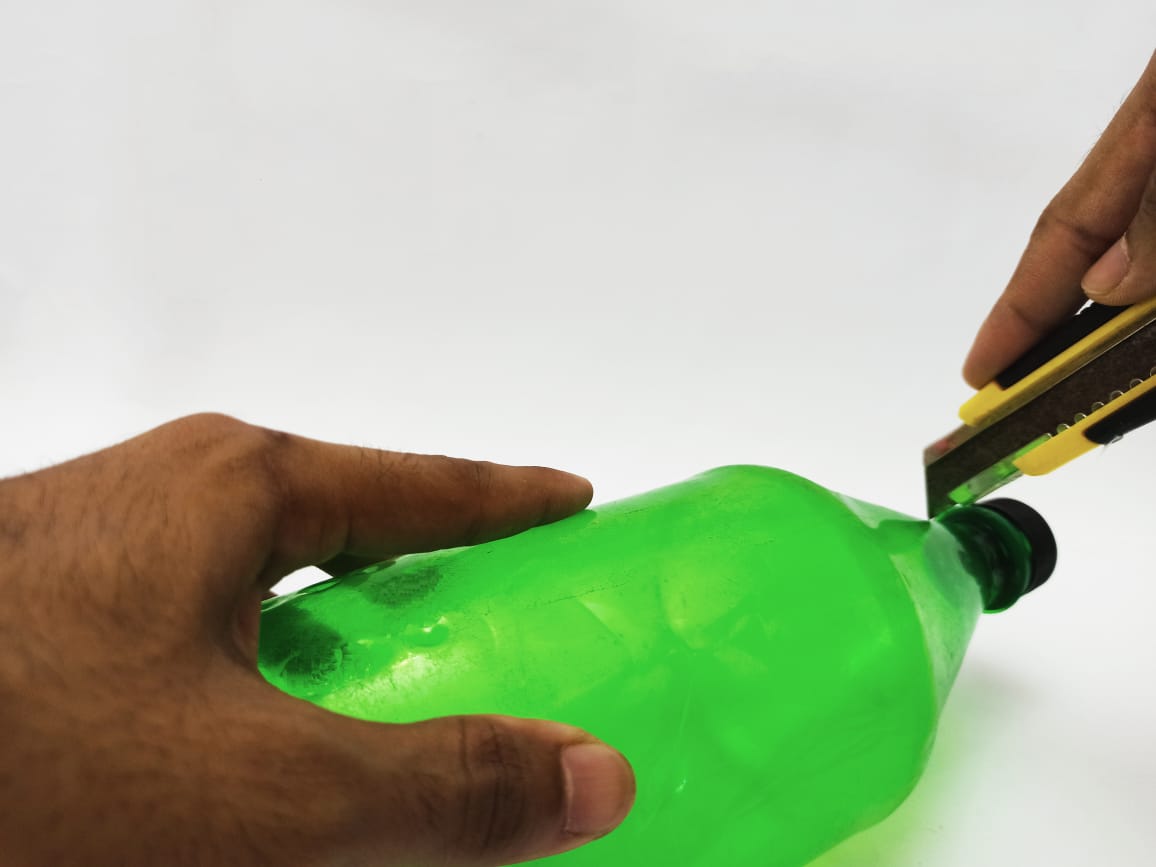
STEP 4: Next, cut the top part of the bottle using a paper cutter.
NOTE:
This step has to be done with the help and guidance of an adult.
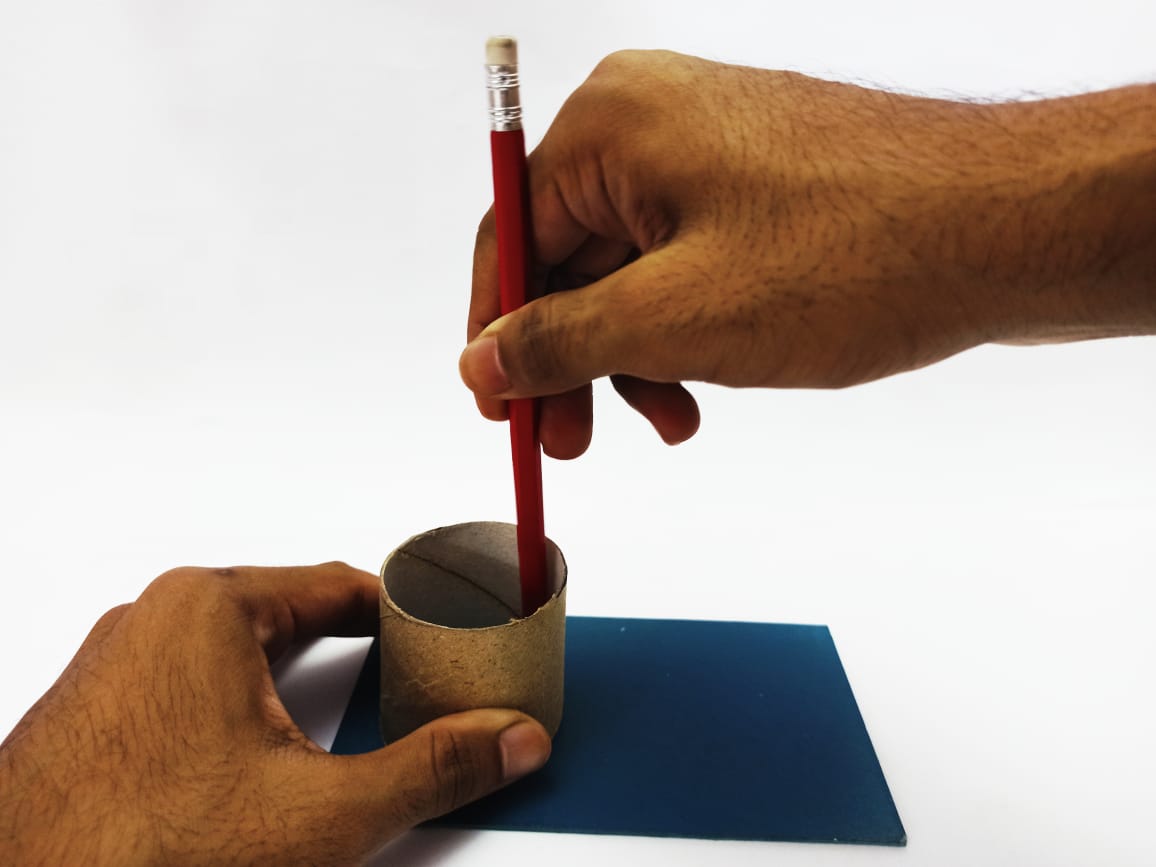
STEP 5: Poke a hole in the cap and pass a pencil through it.
(Use the scissor to make the hole).


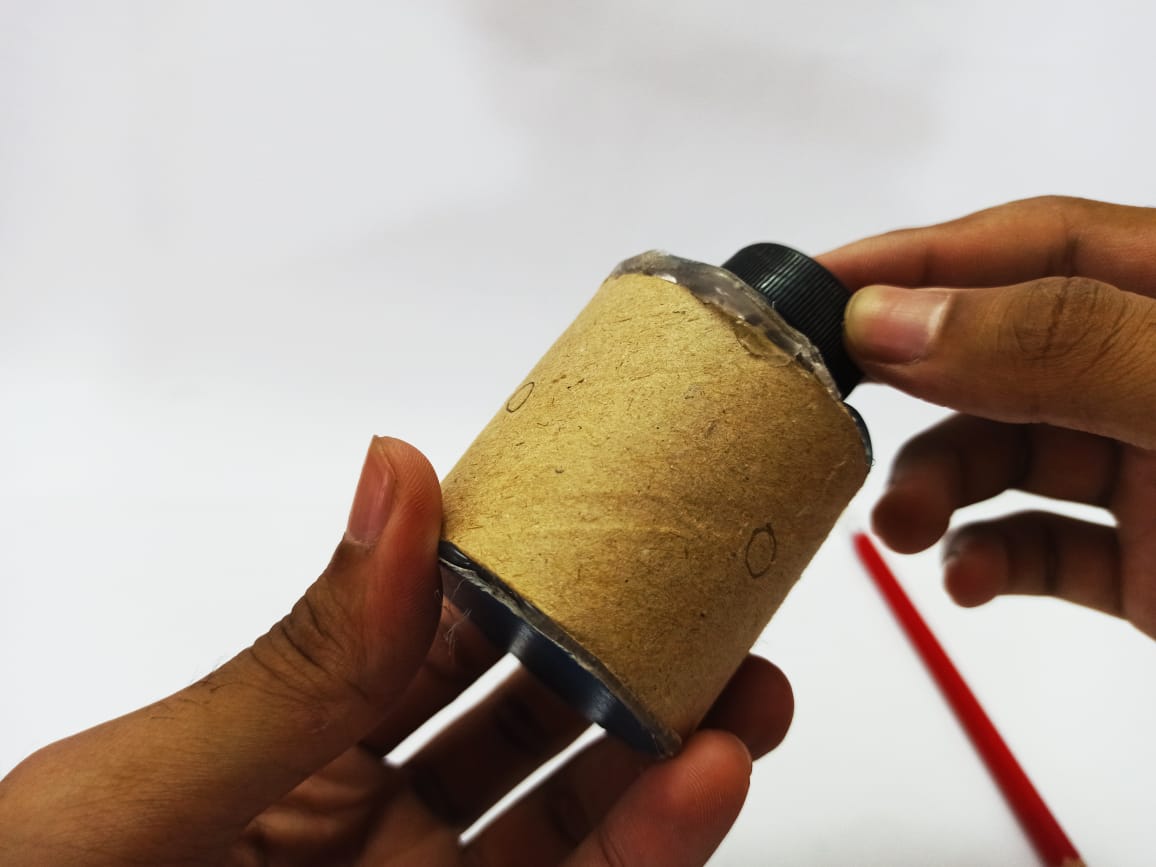
STEP 6: Next, let's take one of the circular cardboard cutouts and cut a hole through the centre to fix the top part of the bottle like this.

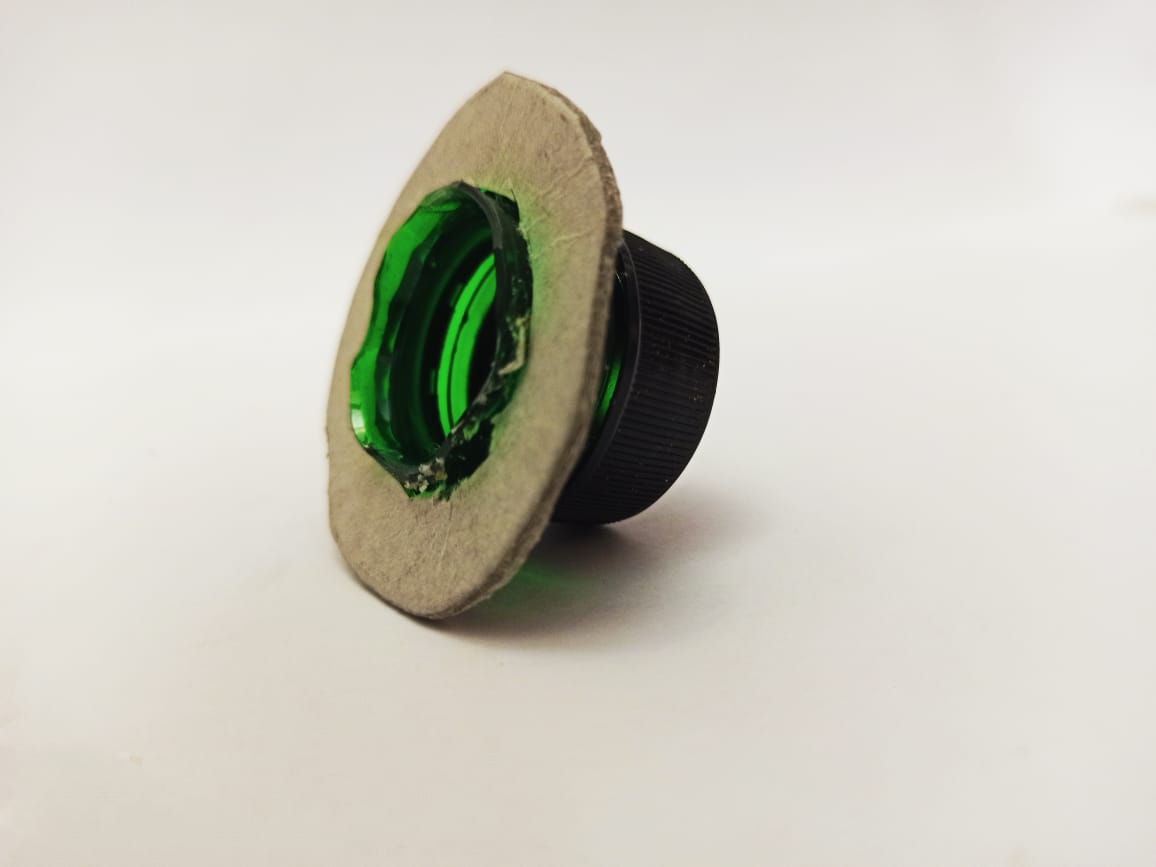
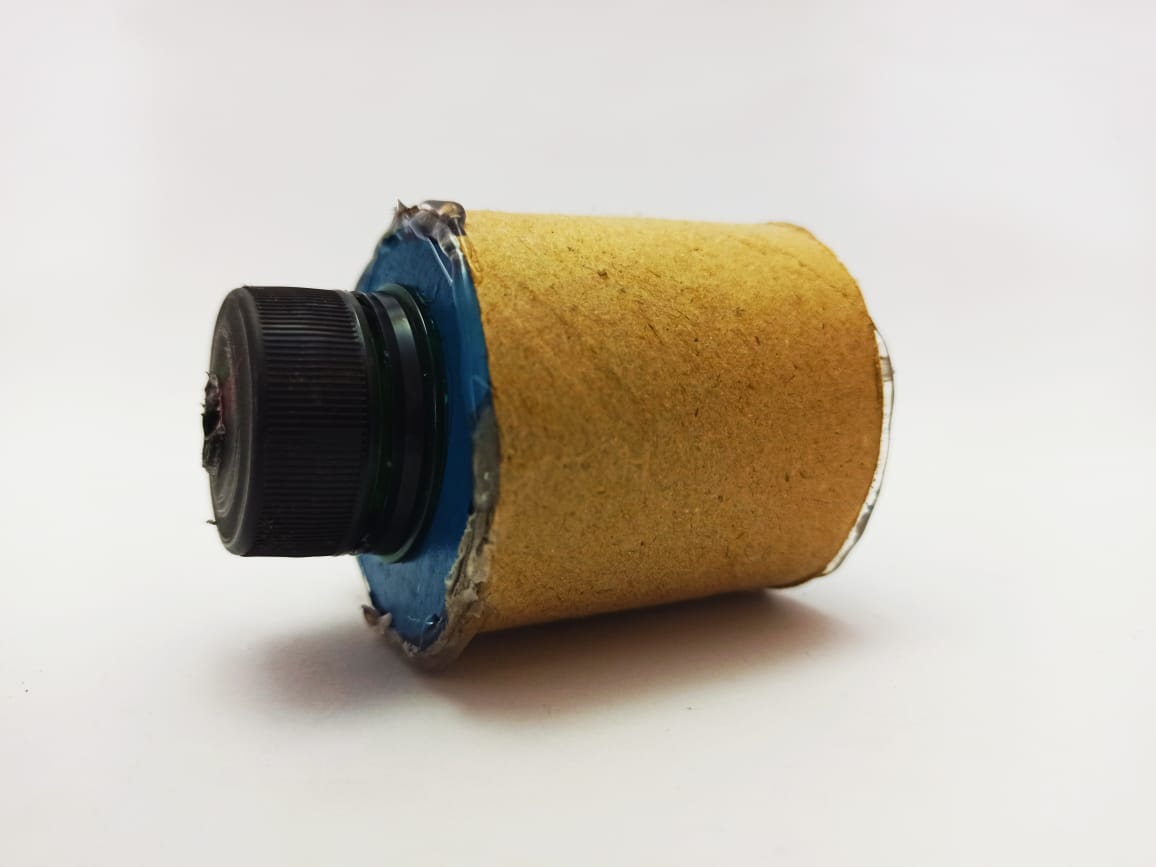
STEP 7: Seal the top and bottom part of tissue roll with the two cardboard cutouts
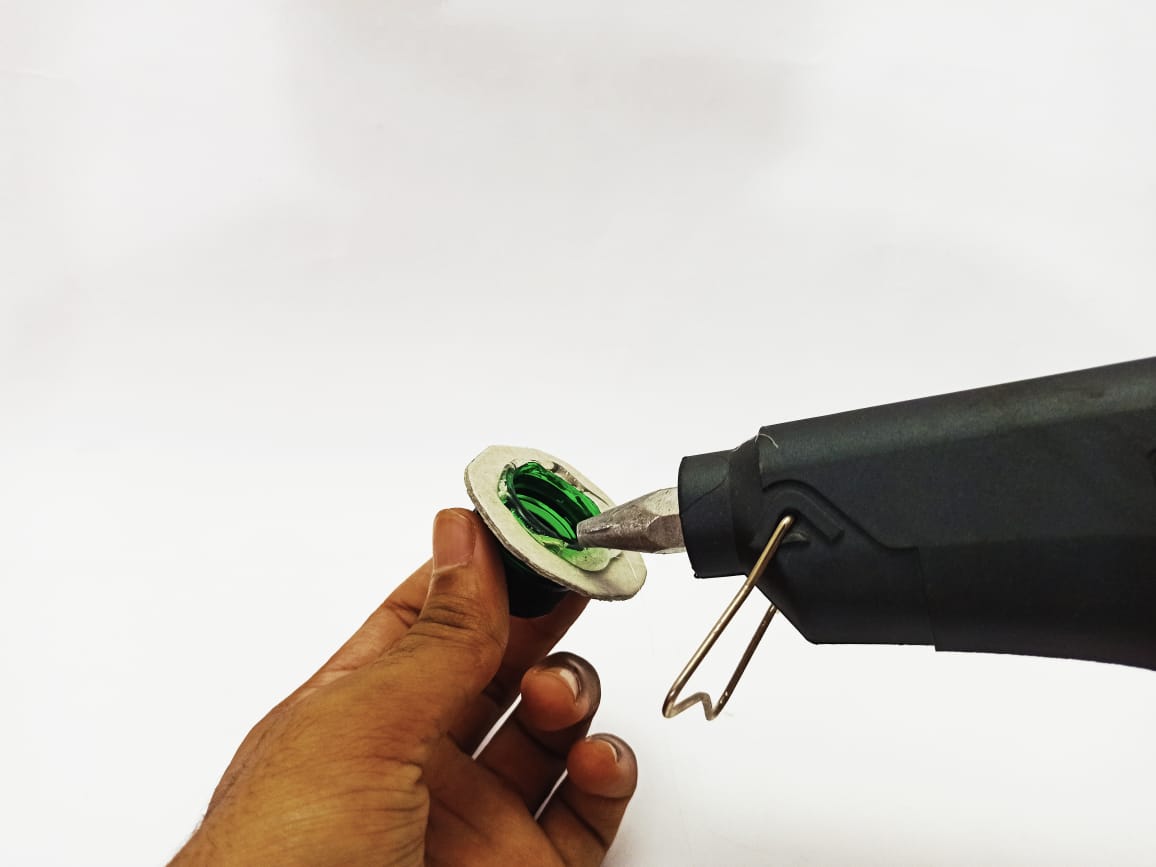

STEP 8: Check if it is sealed properly, apply glue where necessary.

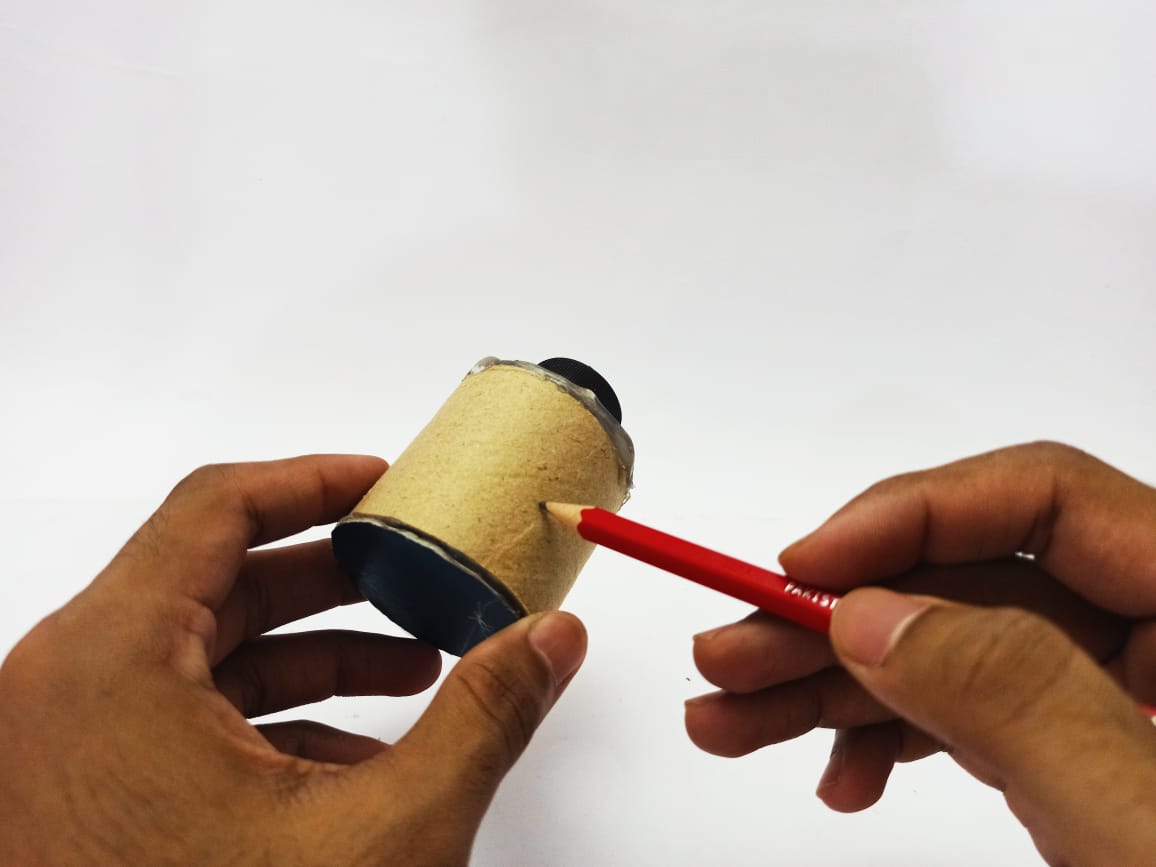
STEP 9: Mark three points using a pencil on the tissue roll. All these points have equal distance between them.
Skip to STEP 12 for better understanding.
STEP 10: Make a hole, big enough to fit a straw inside. Do this for all three points.

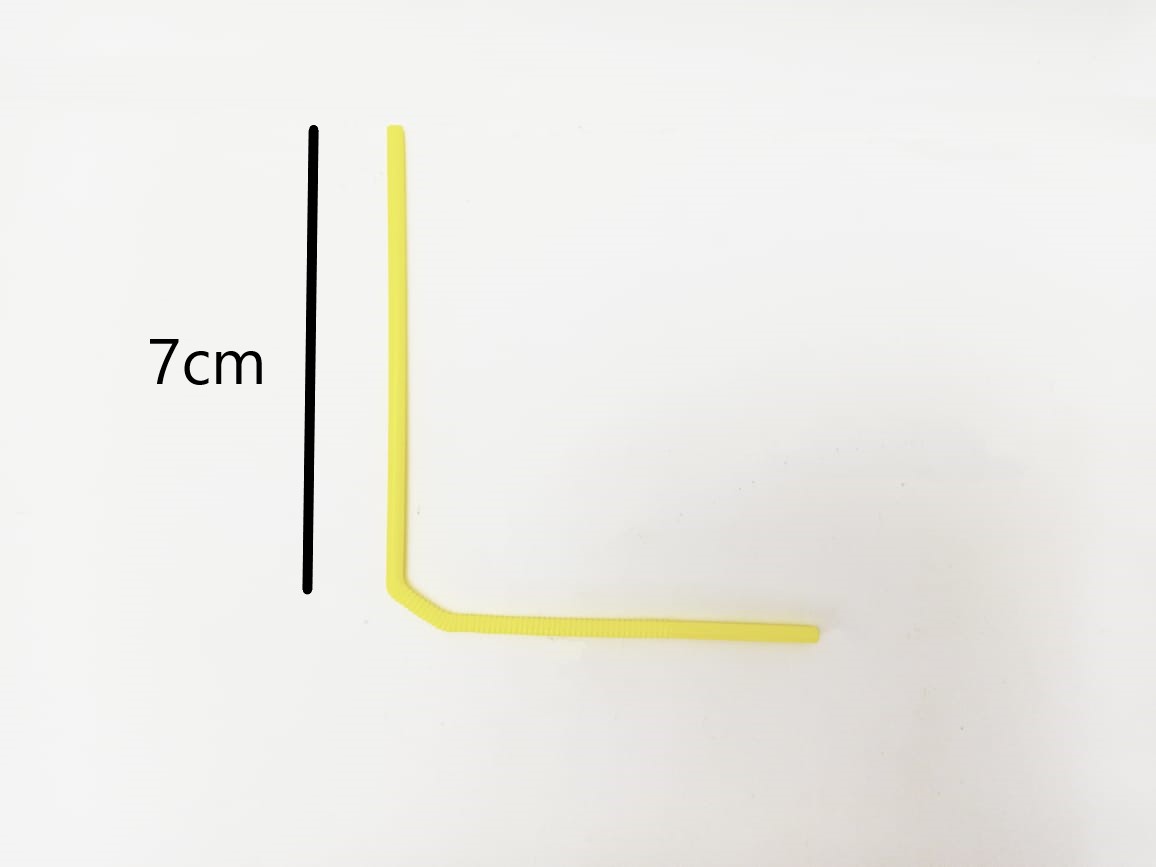
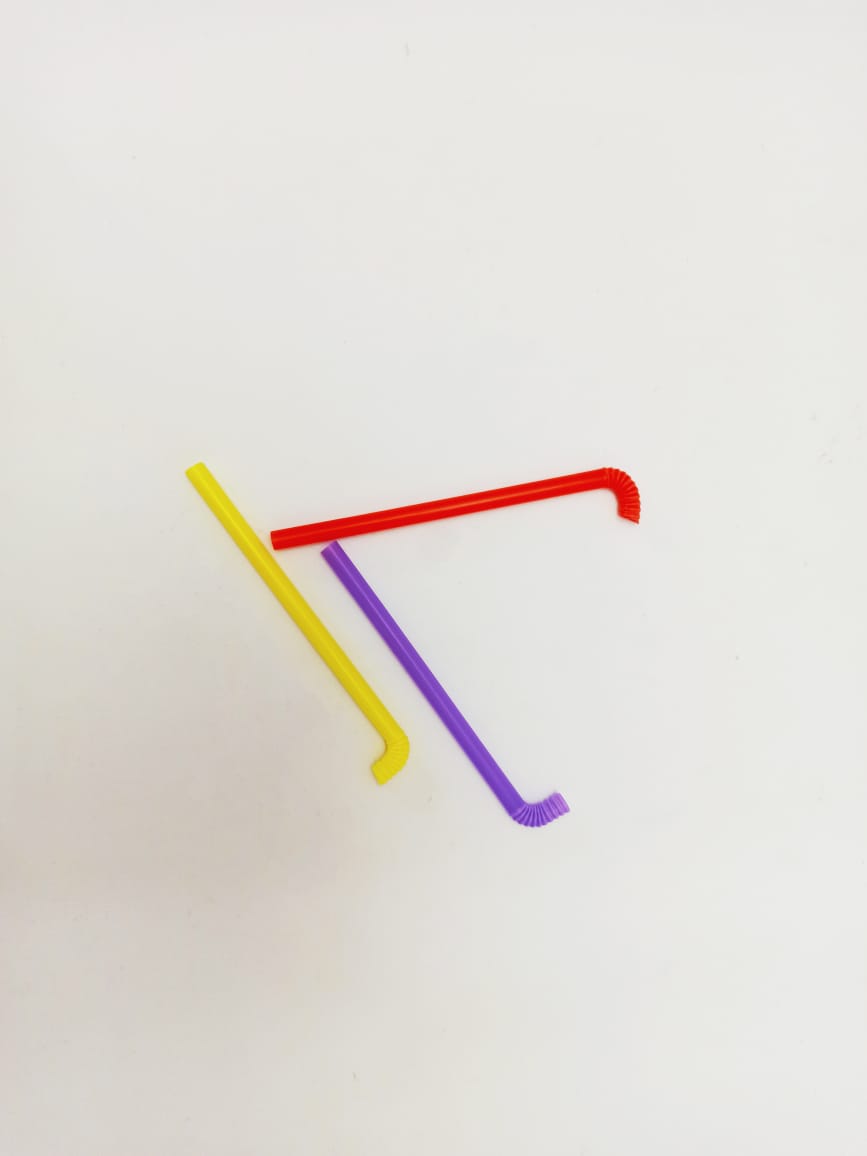
STEP 11: Take a straw and cut a 7cm part of it. Chop the neck, as shown in the image below.
Do this for the other two straws as well.
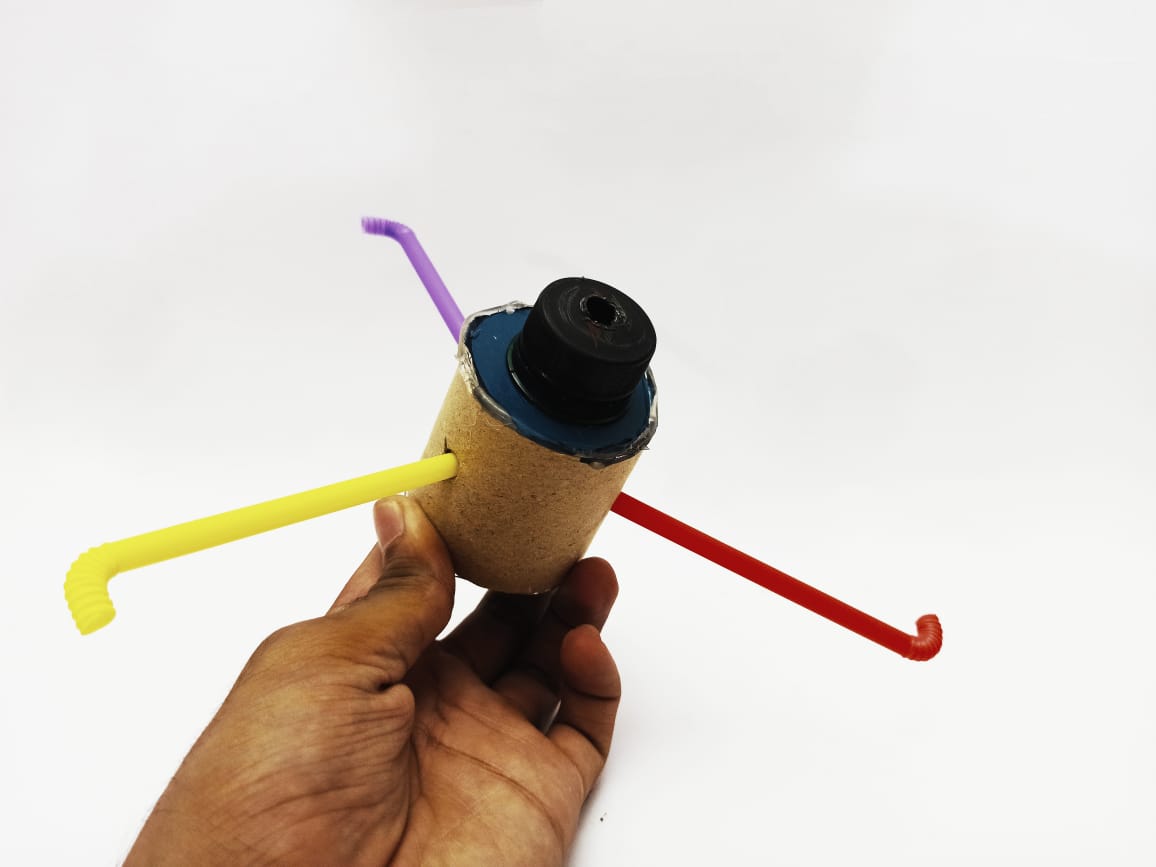
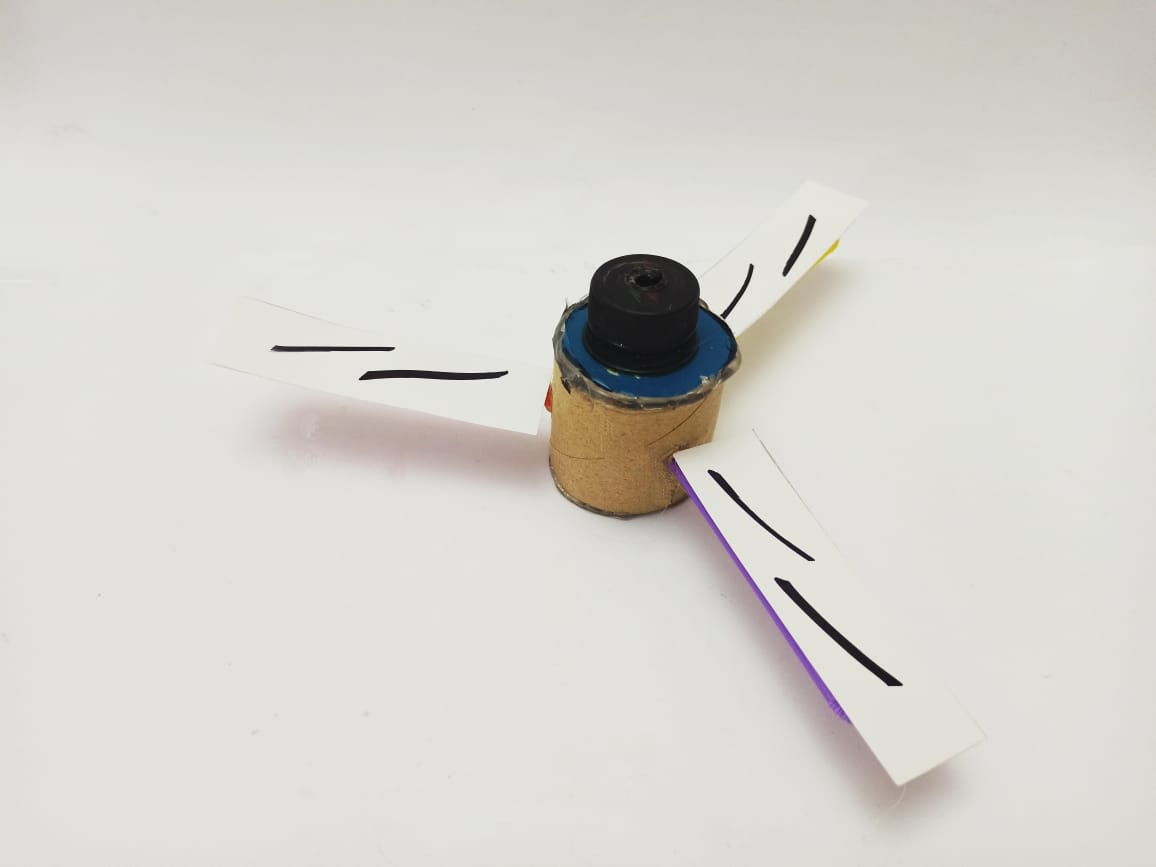
STEP 12: Fit the straws inside the 3 holes we made in STEP 10.
The air will come out from the straw openings causing it to spin.

STEP 13: On a piece of paper, draw three equal rectangles of the size given below.
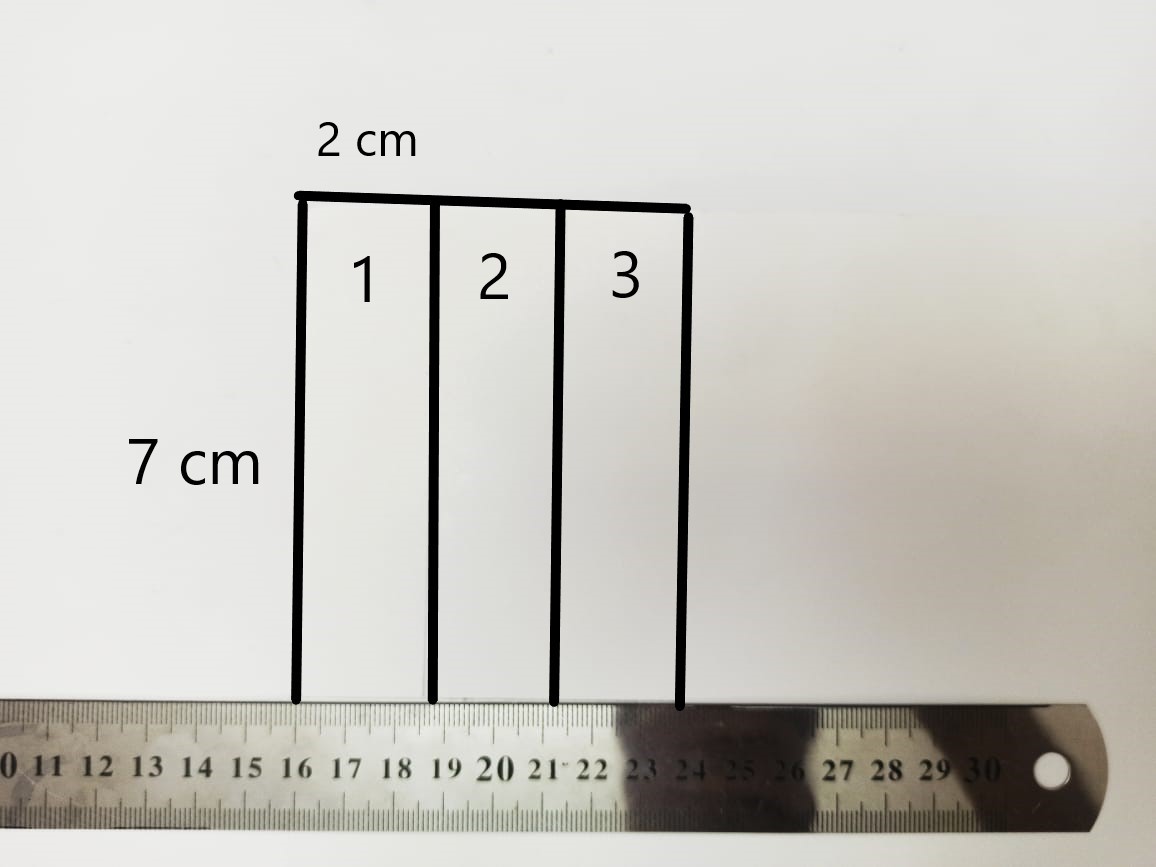
STEP 14: Cut them out and stick them on the top of the straw.
*These are the wings of our Ballooncopter.
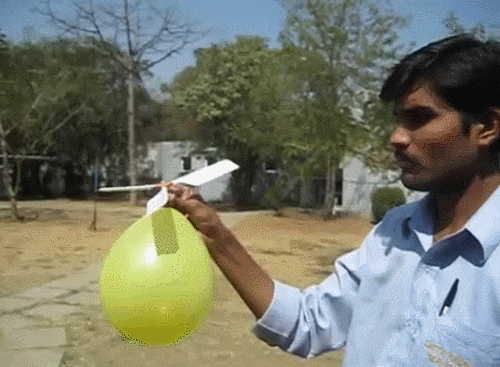
STEP 15: Finally, inflate a balloon and attach it to the top like this.

See your Ballooncopter flying!