Activity Execution
What is a Rover?
Twelve months in 2 minutes!
Let's think about using energy to power up the rover or any vehicle! The energy has to be stored to be used by the rover/vehicle. How is stored energy used to make any vehicle move?

Get Curious!
The Curiosity Rover was launched from Cape Canaveral, Florida on November 26, 2011, and landed on Mars on August 6, 2012. Image [10].
According to NASA, Curiosity has been roaming around Gale Crater, which, it discovered, contained lake billions of years ago and an environment that could have supported microbial life. The rover is still hunting for clues related to this environment. [3]

We're now ready to make a Balloon Moon Buggy. Let's get going!
Below we have given the steps that show you the materials required and guide you on how to make the balloon moon buggy which will be powered by the balloon!
What are the material requirements?

| Material | Quantity | Dimension/ size/weight (if applicable) | Alternative (if applicable) |
| Cardboard sheet | 1 | 6†x 3.5†| Piece of milk carton cut in given size |
| Wooden skewer | 2 | 6†- 8†(length) | Barbecue stick |
| Bottle cap of a soft drink bottle with a hole in the centre to tightly pass a skewer (hole can be made using any pointed tool/thing) | 4 | - | - |
| Straws | 4 | - | - |
| Balloon | 2 | Party balloon 10†- 12†(inflated size) | - |
| Scissor | 1 | Round edge | - |
| Pencil | 1 | Any type | - |
| Ruler | 1 | 12†| - |
| Duct tape | 1 | ½†width | Paper tape/masking tape |
| Board Marker | 1 | Standard | Any other marker |
Let's get started!
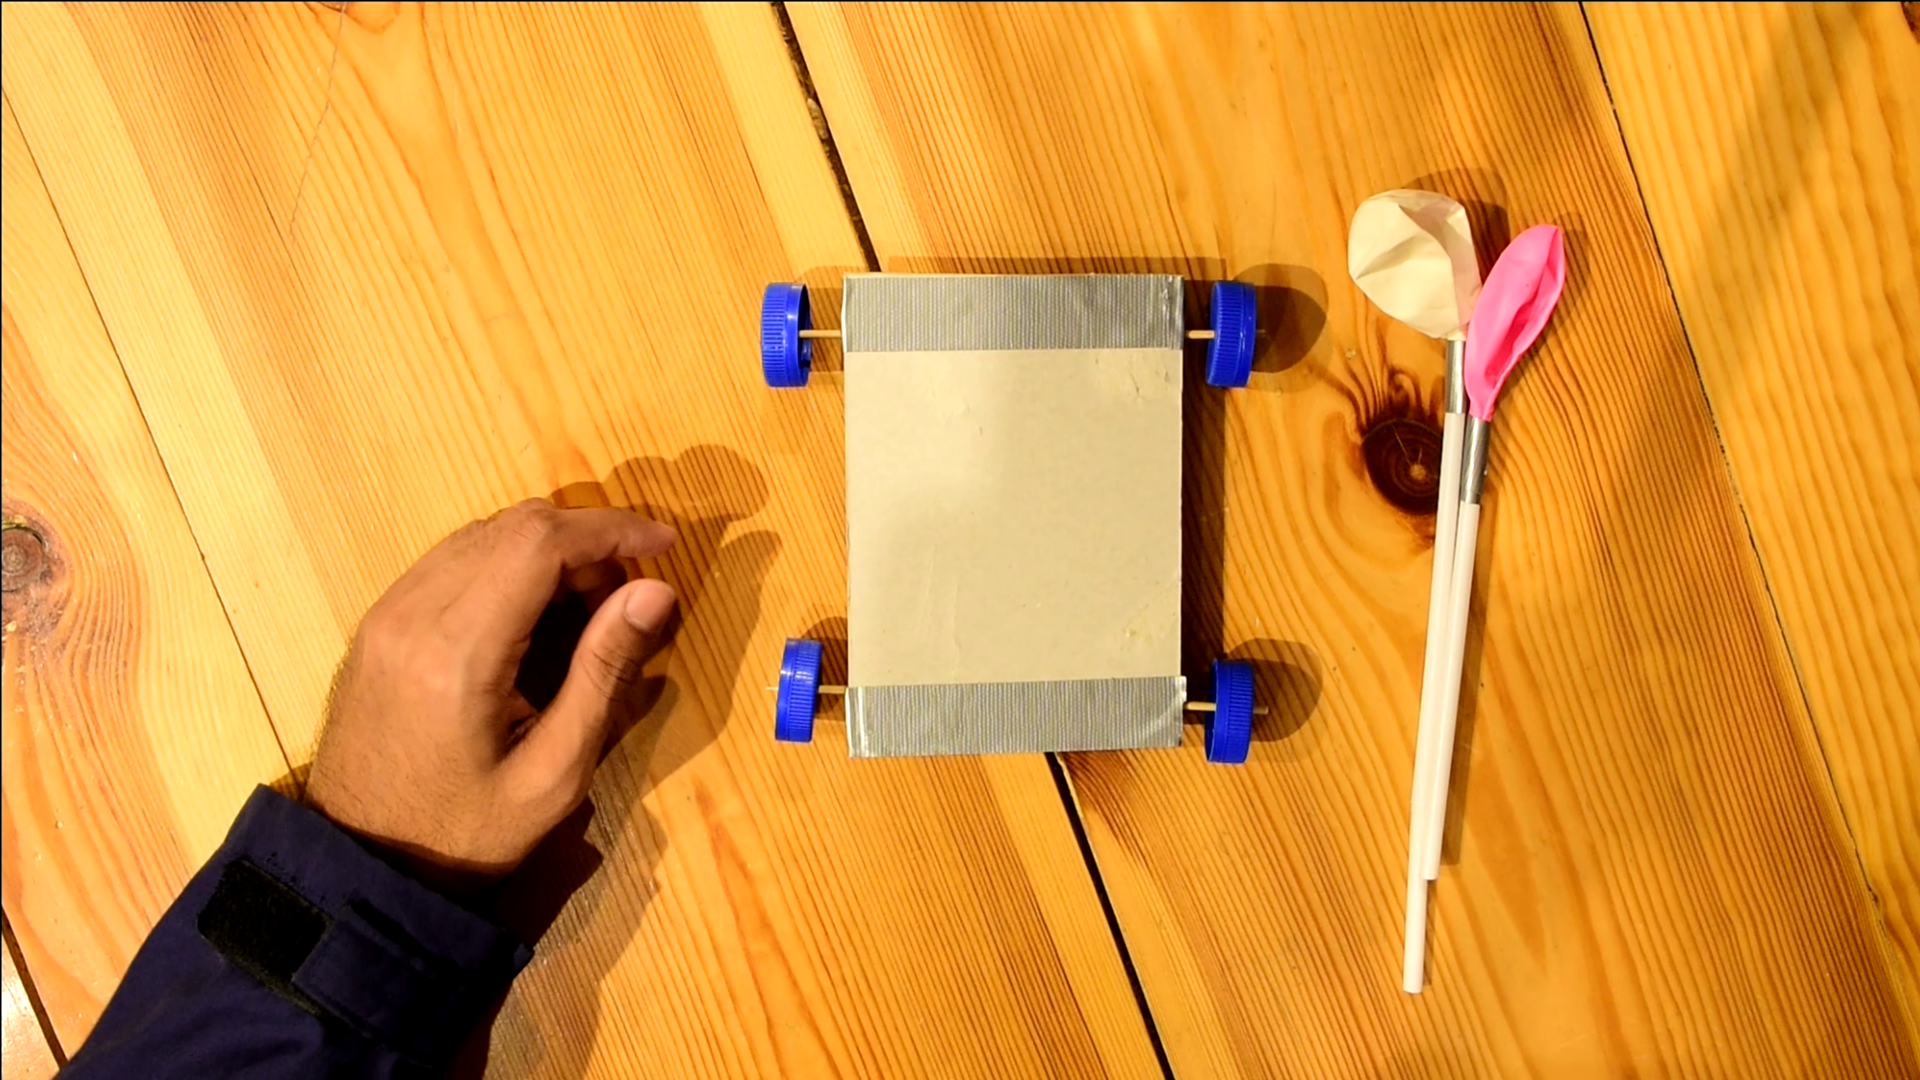
STEP 1: We will start by taking a cardboard sheet and mark 4 horizontal lines at the four sides.


STEP 3: Cut the two straws into halves.


STEP 3: Stick the four straws on the marked lines.

STEP 4: Pass the skewer through one of the caps.

STEP 5: Now let's cap it at both the ends and do it for the other side as well.


Are the wheels attached properly?
Give it a push!STEP 6:
- Take a balloon and chop its neck off.
- Insert a straw and seal it with a duct tape.
STEP 7: Now attach the engine to the buggy.
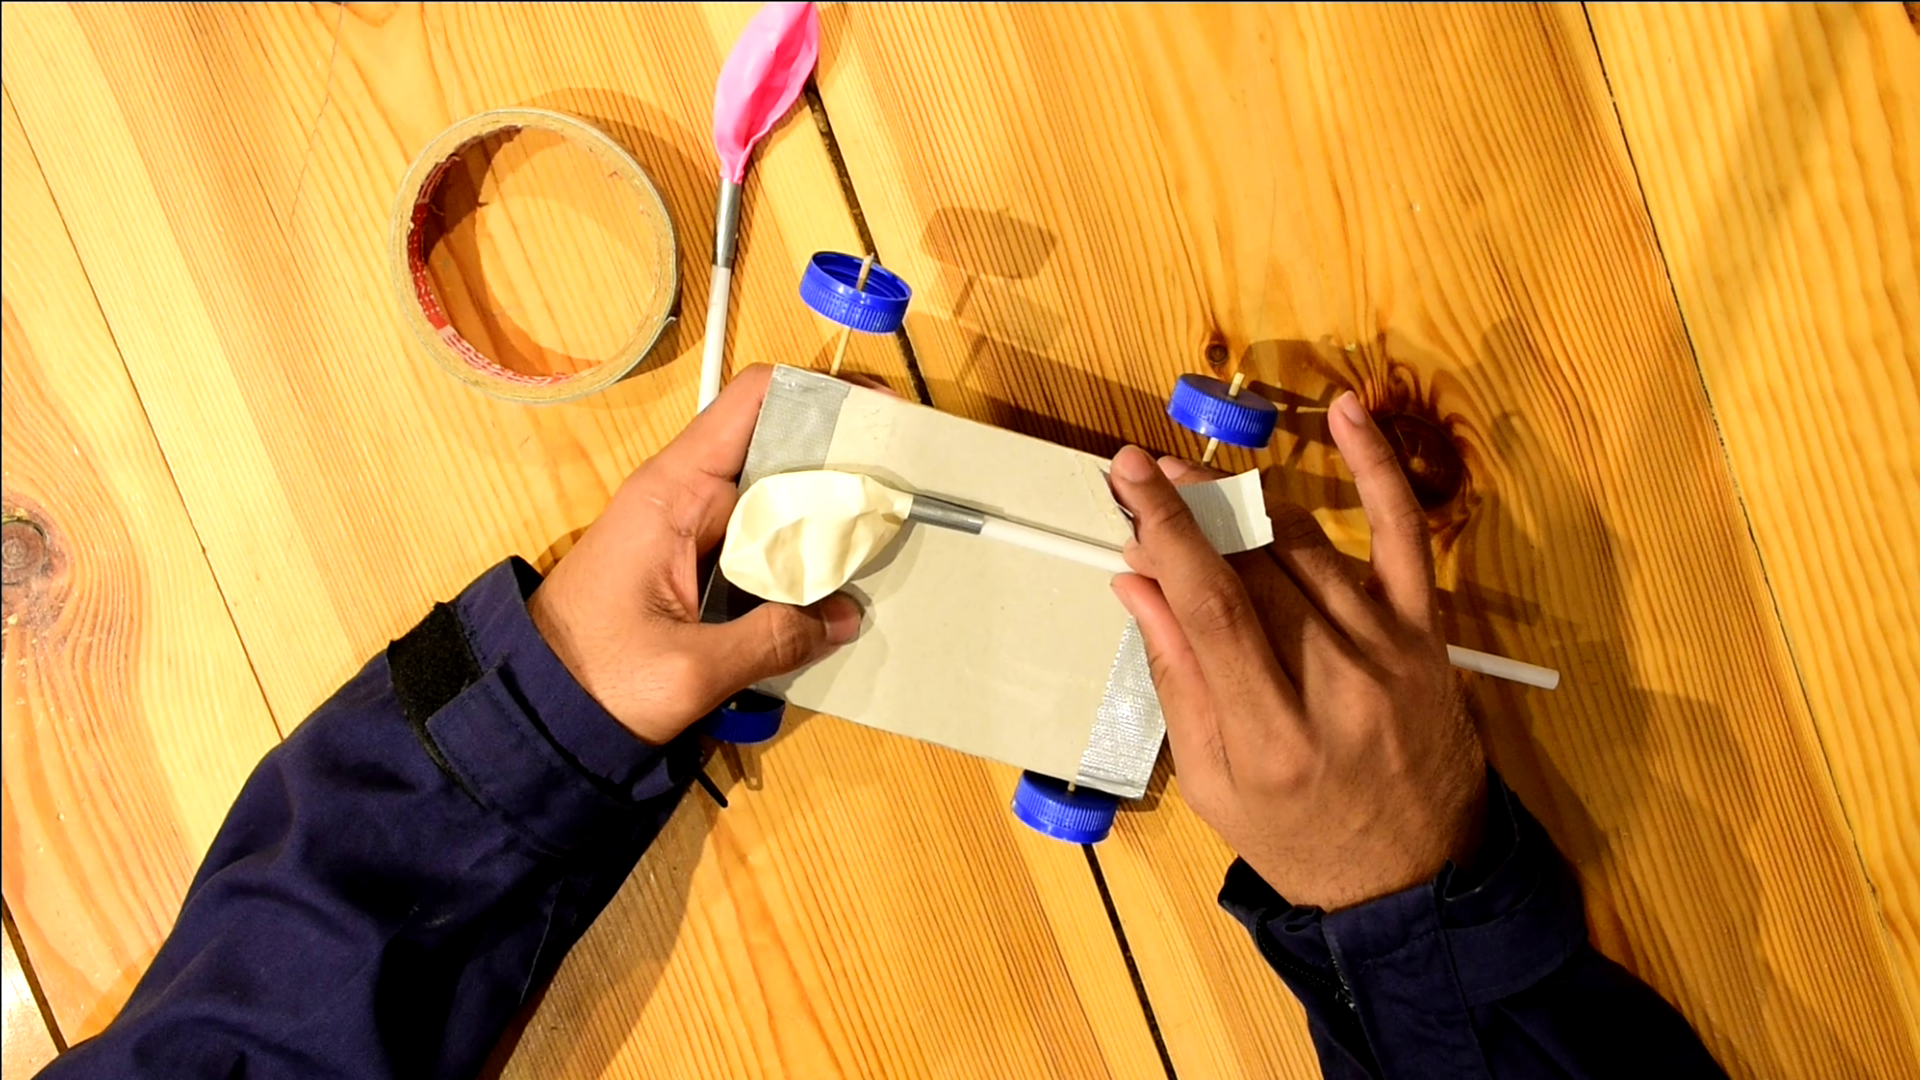
Tape it with a piece of duct tape!

Blow air from the open end of the straw and keep your finger there to block it.