Strawkets
Your Learning Goals..
1. Investigate the forces on a flying rocket, such as drag and lift.
2. Apply Newton’s 3rd law of motion to moving bodies.
3. Examine the effects of air friction and gravity pull.
Strawket = Rocket made out of straw!
Preparations for Mission to Mars 2025 are in full swing. Design a unique and efficient model of the rocket and send it to us for inspection.
It might get selected for review by NASA!
Leaving for the Red planet!

Dr Robert Hutchings Goddard (1882-1945) is considered the father of modern rocket propulsion. A physicist of remarkable insight, Goddard also had a unique genius for invention. It is in memory of this brilliant scientist that NASA's Goddard Space Flight Center in Greenbelt, Maryland, was established on May 1, 1959 [1].
Sea Dragon Rocket
World's largest reusable rocket concept
Let's begin

Here's what you would need.
| Material | Quantity | Dimension/ size/weight (if applicable) | Alternative (if applicable) |
| Straw | 2 | 5” - 7” | - |
| Board Marker | 1 | Standard | Pencil |
| Blank Paper | 2 | A4 size | - |
| Scissor | 1 | Small, round-edged | - |
| Ruler | 1 | 12 inches | - |
| Duct tape | 1 | ½ inch width | Any other tape |
Step 1: Either get the PDF file 'Strawket Printout' in the 'Resources' tab printed, or draw the following on the paper.
(In case you have the Strawket printout, skip to 'Step 4').
- Divide the paper horizontally into half.
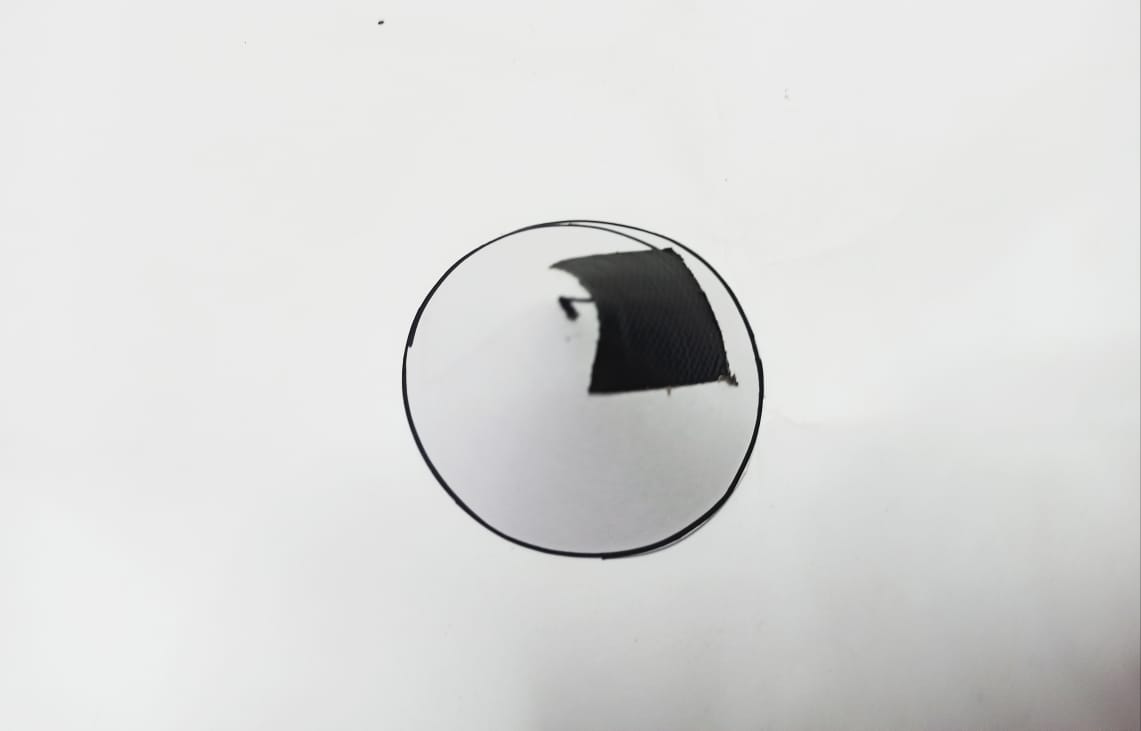
- Draw a circle using the tape pool, like this.

Step 2: Now, draw a line of 9 cm in length and mark a centre point on it.

Step 3: Draw a vertical line of 7 cm on the centre point and join it to the two edges of the horizontal line to create a triangle.

Step 4:
- Cut the paper into half on the line we drew in 'Step 1'.
- Put the straw at the edge of the paper and start rolling it up against the paper.

Step 5: Keep rolling the straw until the whole paper is consumed, then secure it in the same position with a piece of tape.
Remove the straw.

Step 6: Pinch either one of the sides of the rolled paper and bend it over.
We want to block on either one of the openings so that the air can not escape through it.
Step 7: Finally, secure it with tape.

Step 8: Let's take the other half of the paper and cut these shapes out.

Be careful, don't hurt yourself with the scissor!

Step 9: Mark a center point on the circle and draw a line from this point to any point on the circle.

Step 10: Cut on the drawn line and bend one of the sides out. Then overlap it to the other side to turn it into a cone.
We want our rocket to have a pointy nose so that it can cut through the air easily.


Secure it with tape.
Let's assemble all the rocket parts!

Step 11:
- Take out a piece of tape.
- Make a loop out of it.
- Stick it to the top of the rocket body (pinched end).

Step 12: Attach the nose cone and the fins to the rocket body.
Fins help to maintain stability during the flight.

Final look!

Time to take our first flight!
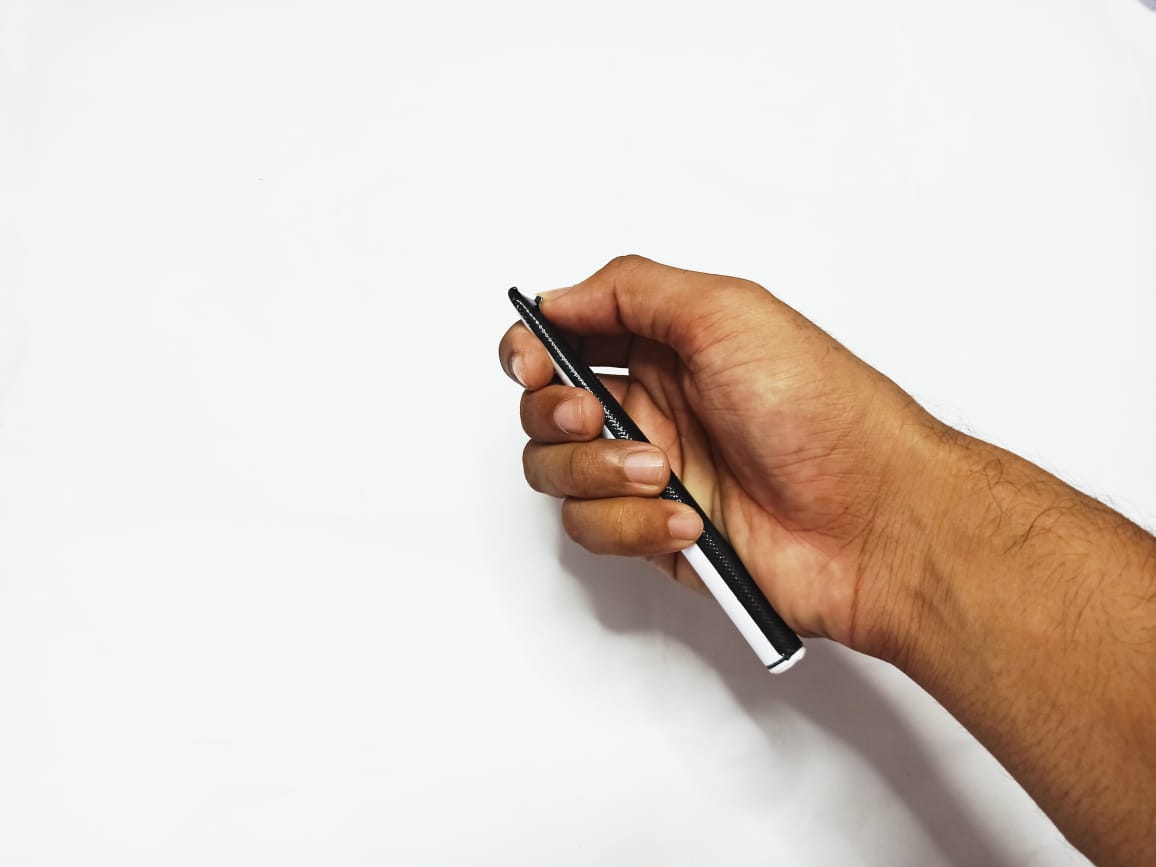
- Insert a straw at the open end of the rocket body.

- Hold the straw in your hand and blow in it to see the rocket launch into space!

Test Report
Let's prepare a test report for our rocket.
To do so, go to the 'Report' tab and get the 'Test Report' printed.
Let's find the range, our rocket can fly to!
Try NASA's young engineer rocket!
https://www.nasa.gov/pdf/15341... [2]
(Aviation Department)